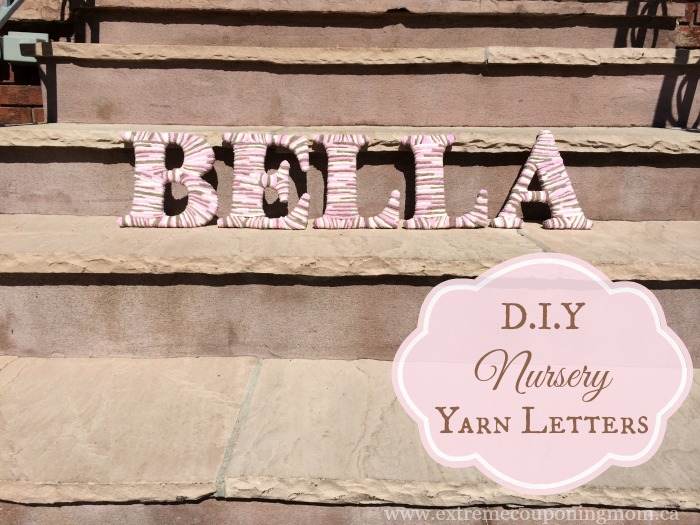
Let’s start off this post with the truth, I am not as crafty as you all may think I am. Digitally I can create beautiful designs for my home, birthday invites, advertisements etc. However when it comes to leaving the digital world and getting my hands dirty sometimes I fail, sometimes things take me a while to get the hang of, but I keep at it and I have found that physically crafting things has become easier for me.
I fell in love with the idea of doing DIY Yarn Wrapped Letters for Bella’s nursery in colours that matched her custom bedding and other decor when I saw them while browsing on Etsy. However being frugal I knew I could make them much cheaper than the steep price many were charging on there.
My best friend Brittany came for a visit from out west and brought Bella a beautiful crochet blanket she made in the exact colours of Bella’s room decor. It was at this point I knew I had to go out and get the yarn she had used and begin the task of making Bella’s name for her room out of wooden letters and yarn.
It is fairly simple to make these DIY Yarn Wrapped Letters once you get the hang of it and I will give you instructions below!
DIY Yarn Wrapped Letters
Supplies:
- Yarn
- Wooden Letters
- Glue Gun
- Glue Sticks
- Scissors
- Drop cloth or newspaper to protect the surface you are working on from any hot glue
Instructions:
1. Find a large space to do this project on, I found my kitchen table was the best spot for me as it gave me lots of space.
2. Plug in and let your glue gun warm up, while this is happening decide which letter you want to start with. I personally started with the easiest letters in Bella’s name which were the L’s and E as they had no holes to work with.
3. Starting at one outer edge tip add some glue from your hot glue gun and stick on the beginning of the yarn. Let it cool/dry for a few moments before you begin wrapping.
4. Wrap the yarn around the letter, you will need to stop and go so when ending off an area be sure to glue it down and cut the yarn. I had to wrap horizontal, vertical and diagonal to cover the entire wooden letter.
TIP: On rounded letters you may need to use some hot glue to secure the yarn around the curved parts so it doesn’t slide around. There are tons of videos on YouTube that show visual tutorials should you need them just search DIY Yarn Wrapped Wood Letters on YouTube and they will pop up!
- Williams Sonoma Canada Cyber Monday Sale - December 1, 2025
- Knix Canada Cyber Monday Sale - December 1, 2025
- KitchenAid Canada Cyber Monday Sale - December 1, 2025


Laurie P says
Great idea…..and can be re-done if you want to change things up a bit!
Caroline says
Such a cute idea and I can’t believe how easy it is!
mrdisco says
that’s an awesome project!
Lisa Neutel says
i love this craft project and for someone like me thats not very creative or crafty this is perfect..easy to do
Debbie W says
This would be a nice way to personalize a child/baby room
salexis says
Thank you – I am SO doing this for my friend’s baby (due in December!) 🙂
Debbie White Beattie says
What a cool idea and very creative. I don’t have a creative bone in me but oh how I wish I did, great job.
kathy downey says
Great job i love them,they look so soft!